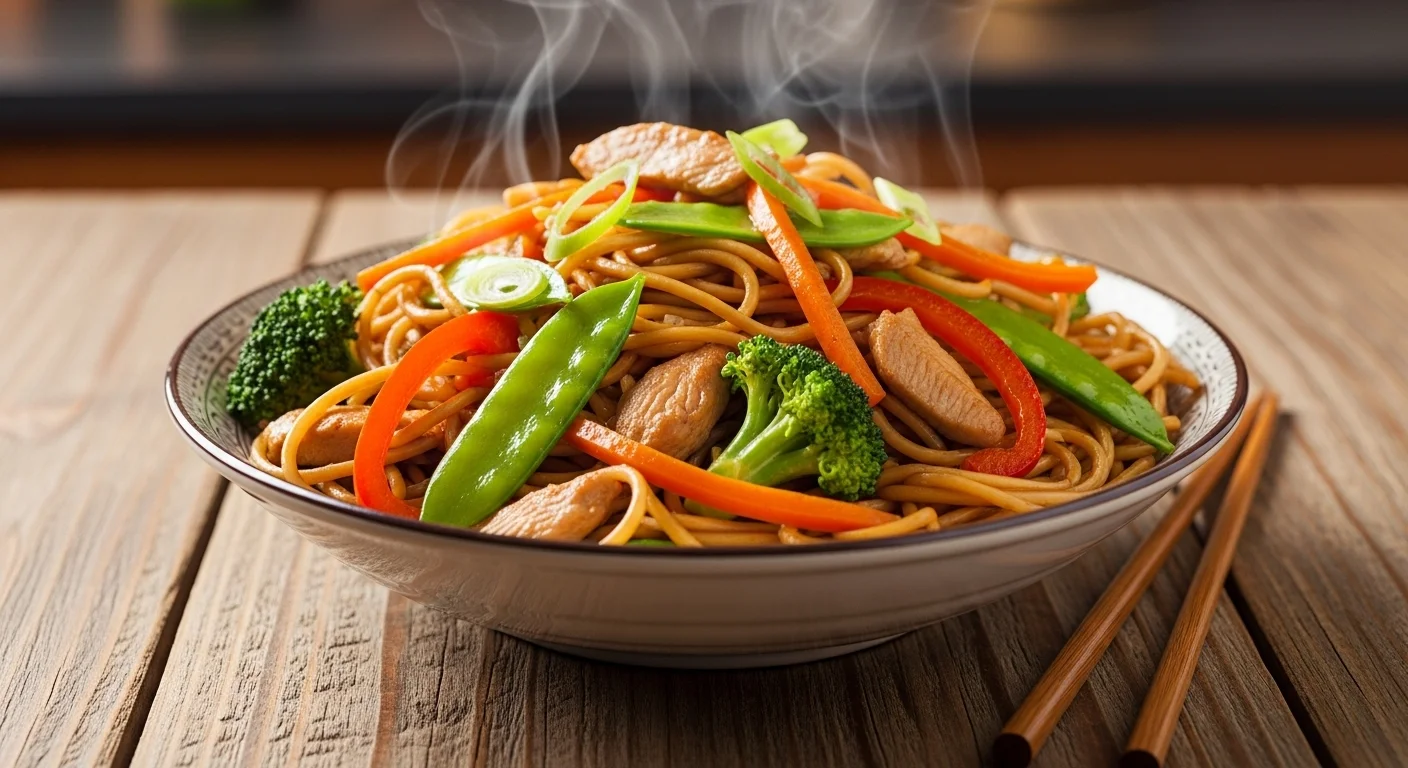
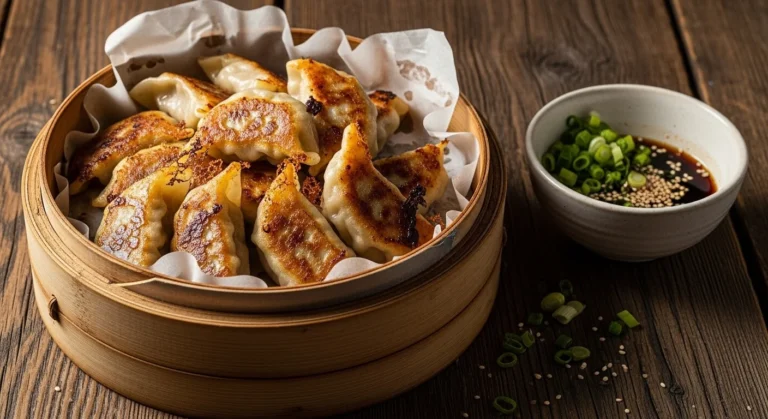
How to Cook Chow Mein That’s Quick and Delicious
If you’ve ever craved takeout but didn’t want to wait (or pay delivery fees), chow mein is your new best friend. This classic stir-fried noodle dish is fast, flexible, and endlessly satisfying. With the right prep and a hot pan, you can have restaurant-style chow mein on the table in under 30 minutes—yes, really.

Whether you’re cooking for one, feeding a family, or just trying to clean out your fridge, this guide will walk you through how to cook chow mein that’s quick, delicious, and totally weeknight-friendly.
What Makes Chow Mein So Good (and So Fast)?
Chow mein is all about high heat + simple ingredients + smart timing. Unlike saucy noodle dishes, chow mein relies on a light but flavorful sauce that coats the noodles without drowning them.
The beauty of chow mein is that it’s:
- Ready in under 30 minutes
- Customizable with whatever protein or veggies you have
- Cooked in one pan (hello, easy cleanup)
Once you understand the basics, you’ll never need a takeout menu again.
Ingredients You’ll Need (Simple and Flexible)
Before you turn on the stove, get everything ready. Stir-frying moves fast, so prep is key.
Core ingredients:
- Chow mein noodles or thin egg noodles
- Neutral oil (canola, peanut, or vegetable)
- Garlic (minced)
- Green onions
Veggie options (mix and match):
- Shredded cabbage
- Carrots (julienned)
- Bell peppers
- Bean sprouts
- Snow peas
Protein choices (optional but great):
- Chicken breast (thinly sliced)
- Shrimp (peeled and deveined)
- Beef (flank steak works well)
- Tofu (extra-firm, pan-seared)
Simple chow mein sauce:
- Soy sauce
- Oyster sauce
- Sesame oil
- A pinch of sugar
- Optional: splash of water or broth

Step 1: Prep the Noodles the Right Way
Cook your noodles according to package instructions, but here’s the trick:
Undercook them slightly. They’ll finish cooking in the pan later.
Once cooked:
- Drain immediately
- Rinse briefly with cold water (stops cooking)
- Toss with a tiny bit of oil to prevent sticking
Set them aside and move on quickly—these noodles are ready to shine.
Step 2: Build Flavor with High Heat
Grab your largest skillet or wok and crank up the heat. Chow mein loves heat—it’s what gives you that classic stir-fried flavor.
- Add oil to the hot pan
- Cook your protein first (if using), then remove and set aside
- Add a bit more oil if needed
- Toss in garlic and veggies, stir-frying until crisp-tender
You want veggies that still have bite, not soggy sadness.

Step 3: Sauce, Noodles, and the Final Toss
Now comes the magic moment.
- Add noodles back into the pan
- Return cooked protein
- Pour in your prepared sauce
- Toss everything together quickly and evenly
Let the noodles sit untouched for 20–30 seconds at a time. This helps them caramelize slightly and soak up flavor.
Taste and adjust:
- More soy sauce for salt
- A tiny pinch of sugar to balance
- A drizzle of sesame oil for aroma
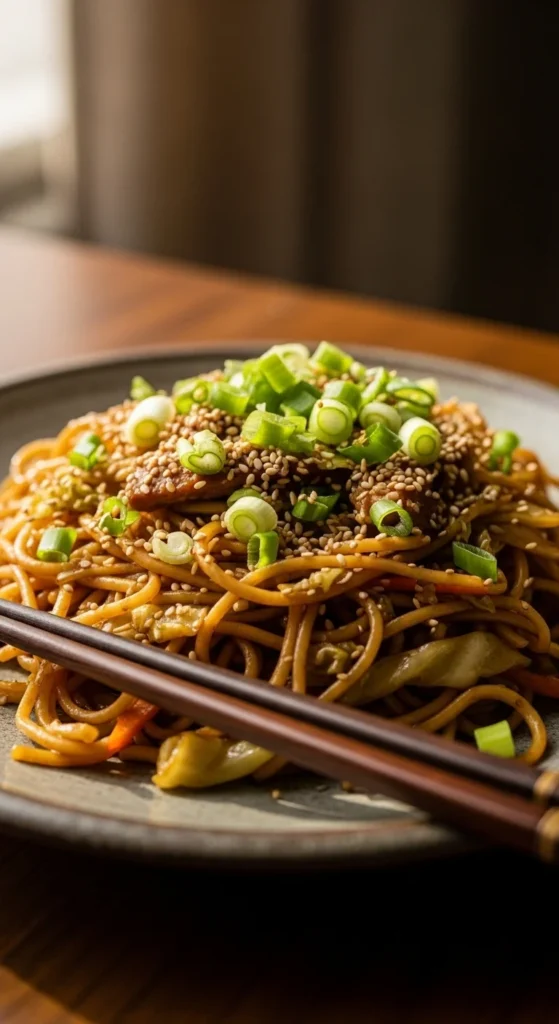
Finish with sliced green onions and turn off the heat.
Pro Tips for Takeout-Style Chow Mein at Home
Want to level up? Keep these tips in your back pocket:
- Don’t overcrowd the pan. Cook in batches if needed.
- Dry noodles stir-fry better. Excess water = soggy results.
- Prep everything first. Chow mein waits for no one.
- Use high heat, always. Medium heat just won’t cut it.
These small details make a big difference.
Serving and Variations You’ll Love
Chow mein is perfect on its own, but you can dress it up easily:
- Add chili oil or chili crisp for heat
- Squeeze fresh lime for brightness
- Top with sesame seeds or crispy onions
You can also make it:
- Vegetarian
- Gluten-free (with tamari and rice noodles)
- Extra saucy or lightly seasoned
It’s your pan—do your thing.
Final Takeaway
Chow mein proves that fast food doesn’t have to come from a drive-thru. With a handful of ingredients, a hot pan, and a little confidence, you can create a meal that’s comforting, customizable, and seriously delicious.


Осознанный гемблинг — это комплекс принципов, направленных на защиту психологического и материального равновесия участника.
Главная идея состоит в том, что игра должна восприниматься только как развлечение, а не как способ заработка.
Игроку следует заранее устанавливать ограничения по длительности и деньгам и неукоснительно их придерживаться.
https://online-festival.ru/detail/3076-tayna-podvala-pochemu-mat-mnogodetka-khranila-pochti-400-skeletov.html
Необходимо уметь замечать ранние признаки зависимости, такие как желание отыграться и пренебрежение повседневными делами.
Операторы должны предлагать инструменты ограничения: паузы, ограничения пополнений и блокировку аккаунта.
Соблюдение этих рекомендаций позволяет удержать игру в комфортных рамках, не причиняя ущерба своей психике и окружающим.
Разумное отношение к азарту — это принцип к казино, базирующийся на самоограничении и понимании рисков.
Эта концепция включает добровольное ограничение продолжительности и денег на игру.
Каждый участник обязан предварительно определять лимиты ставок и строго их соблюдать.
https://pr-realty.ru/estate/998-proshchanie-s-mikhailom-nozhkinym-trogatelnyy-moment-blagodarnogo-syna-u-groba/
Разумное отношение к азарту — это подход к азартным сессиям, основанный на контроле и понимании рисков.
Эта концепция включает осознанное лимитирование продолжительности и расходов на игру.
Любой игрок обязан предварительно устанавливать пределы ставок и строго их соблюдать.
https://e-transavto.ru/read/the-fascinating-story-behind-cashman-casino-a-glimpse-into-its-history-and-evolution-480/
Ответственная игра — это подход к азартным сессиям, основанный на контроле и осознании последствий.
Эта концепция включает осознанное ограничение времени и денег на игру.
Любой участник обязан предварительно определять пределы потерь и неукоснительно их соблюдать.
https://vivatpersonal.ru/detail/2026-06-18-sergey-tsekov-o-krymskikh-namereniyakh-ukrainskogo-rezhima-zapadniki-nakhodyatsya-v-tumane.html
Mindful gaming is a set of principles that guarantee gambling remains a form of entertainment rather than a means of financial strain.
Key aspects include establishing personal limits on duration and wagers, as well as recognising the indicators of harmful behaviour.
Ultimately, responsible gambling encourages conscious decisions and helps players to maintain control over their playing habits.
https://labdiz.ru/full/487-tragediya-na-permskom-trakte-gruzovik-vrezalsya-v-legkovoy-avtomobil-pod-ekaterinburgom.htm
Ответственная игра — это подход к азартным сессиям, основанный на контроле и понимании рисков.
Эта концепция подразумевает осознанное ограничение времени и расходов на игру.
Любой игрок должен заранее устанавливать лимиты потерь и неукоснительно их придерживаться.
https://techguru.gucci1.ru/v1az57lXDBuQ/
Для воспитателей обучение крайне важны, поскольку эти программы дают возможность изучать новейшие методики.
В результате этим программам специалисты способны приспосабливаться к новым требованиям образования.
Как результат значительно возрастает уровень преподавания, что непосредственно влияет на учениках и их результаты.
https://gus-info.ru/digest/digest_3656.html
Осознанный гемблинг — это стратегия к азартным сессиям, базирующийся на самоограничении и понимании последствий.
Эта концепция подразумевает осознанное лимитирование продолжительности и расходов на процесс.
Каждый игрок обязан заранее устанавливать пределы потерь и строго их соблюдать.
https://mindset.ullafashion.ru/ogzeLeeQzDxE/
Осознанный подход к гемблингу — это стиль поведения, при котором игры являются способом отдыха, а не стремлением поправить финансовое положение.
Такой подход базируется на управлении временем и бюджетом, а ещё на осознании своих пределов.
https://1-mk.ru/detail/480-trendovye-stili-krossovok-dolce-and-gabbana-v-2024-godu-chto-aktualno-na-ulitsakh/
Разумное отношение к азарту — это принцип к игровым развлечениям, базирующийся на контроле и осознании рисков.
Эта концепция включает добровольное ограничение времени и бюджета на игру.
Любой участник обязан заранее определять пределы ставок и строго их придерживаться.
https://healthcoach.myfashionacademy.ru/GUJIYcBt3nOt/
Кеды бренда — это безупречный микс неповторимой элегантности и современных направлений.
Главной чертой данных пар является яркий внешний вид с применением качественных сырья и культовой отделки.
Эти кроссовки прекрасно смотрятся для повседневной носки, добавляя в образ долю элегантности.
https://nashipesni.ru/pub/2026-07-14-ukhod-za-krossovkami-dolce-andamp-gabbana-kak-sokhranit-vneshniy-vid-i-prodlit-srok-sluzhby/